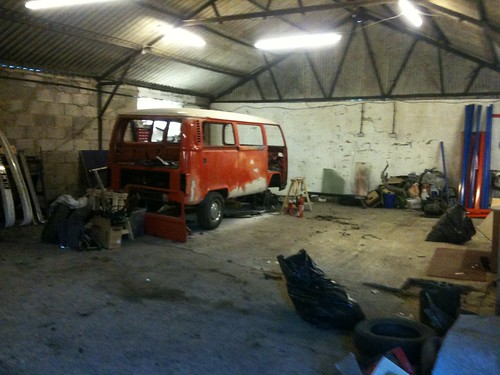
Boris
+5
Erna & David
Grizzly
tint1n
carl & helen
Aussiboris
9 posters
Page 2 of 6
Page 2 of 6 •  1, 2, 3, 4, 5, 6
 Re: Boris
Your right on both accounts servo drill the manifold and the speedo use a drill

Grizzly- Club Member

- Posts : 1358
Join date : 2011-02-04
Location : Hampshire
 Re: Boris
Weeeeee - Nice piccies Rob. Zorbing is booked!!!! 10-11am. Will subscribe to your thread - looking nice mate

Guest- Guest
 Re: Boris
Well done Rob - looks as though you're making good progress there!
We've got the original solex twin carb set up on our 1700 and our servo is fed by the left and right manifolds.
You can see the servo feed coming off the left manifold on the pic below.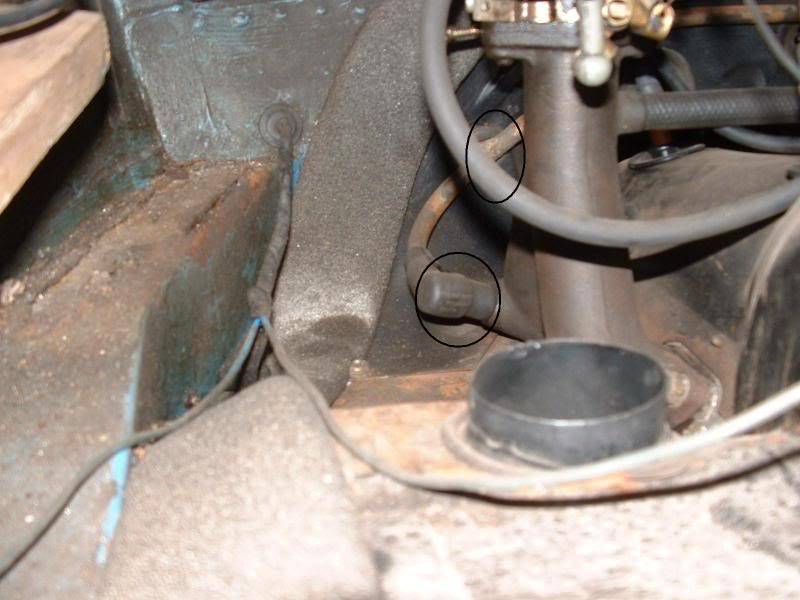
The bottom circle on pic is where the feed comes off the left manifold. The feed from the right manifold is a mirror image of this. There is one pipe going between left and right. The top circle in pic is where it exits through the tinware to the pipe leading to the one way valve. Ours is one continuous pipe untils it gets to other side of tinware.
Tone
We've got the original solex twin carb set up on our 1700 and our servo is fed by the left and right manifolds.
You can see the servo feed coming off the left manifold on the pic below.

The bottom circle on pic is where the feed comes off the left manifold. The feed from the right manifold is a mirror image of this. There is one pipe going between left and right. The top circle in pic is where it exits through the tinware to the pipe leading to the one way valve. Ours is one continuous pipe untils it gets to other side of tinware.
Tone

Tone & Linz- Club Member

- Posts : 67
Join date : 2011-02-07
Location : Norwich
 Re: Boris
Tone & Linz wrote:Well done Rob - looks as though you're making good progress there!
We've got the original solex twin carb set up on our 1700 and our servo is fed by the left and right manifolds.
You can see the servo feed coming off the left manifold on the pic below.
The bottom circle on pic is where the feed comes off the left manifold. The feed from the right manifold is a mirror image of this. There is one pipe going between left and right. The top circle in pic is where it exits through the tinware to the pipe leading to the one way valve. Ours is one continuous pipe untils it gets to other side of tinware.
Tone
Thanks for this Tone. Most appreciated.
I may have to get a closer look next time I see your bus. Pleased to hear that there won't be much hassle going on to twin carbs...still a long way off as I'm still stripping down but can't help thinking ahead most of the time
Out of interest, do you have twin electric motors in the front of your van that demist the windscreen? This is what I've got. Not sure if you see this on late bays much as it appears to be an american spec looking at the circuit diagrams I've seen.
Will get pics up this weekend to explain.
Best wishes,
Rob

Aussiboris- Club Member

- Posts : 273
Join date : 2011-03-06
Age : 45
Location : Bournemouth
 Another update
Thought it was about time I posted another update.
I've been busy at work since coming back from European Bug in (what a show )
)
Still been making time in the evenings where I've been going wild with the DA, sanding block and skims of filler. Been exposing some more holes in places too
This on the passenger side

Drivers side floor area
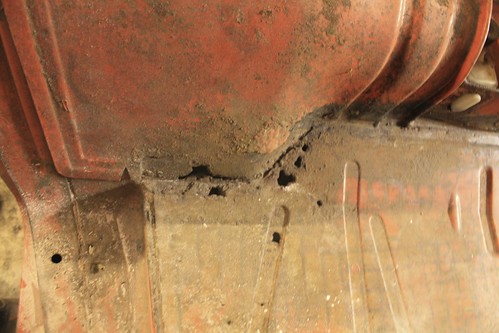
I've got a floor repair section and inner and outer step to go in in this area
Started patching this hole up with a bit of fibreglass
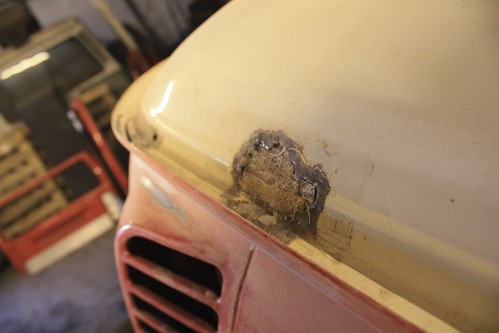
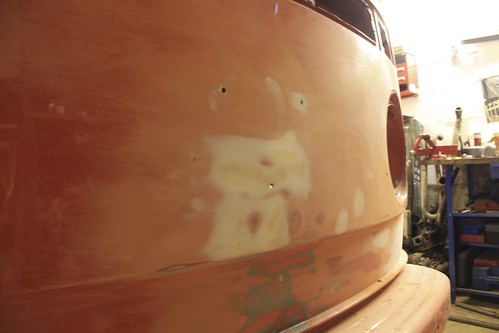
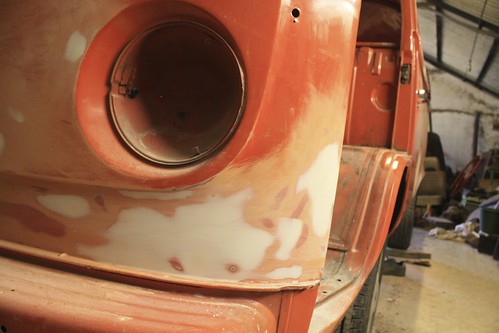
Sorting out the lumps and bumps on the front panel

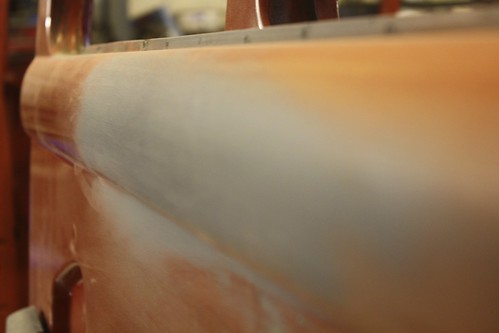
Sorting out the sliding door dents too
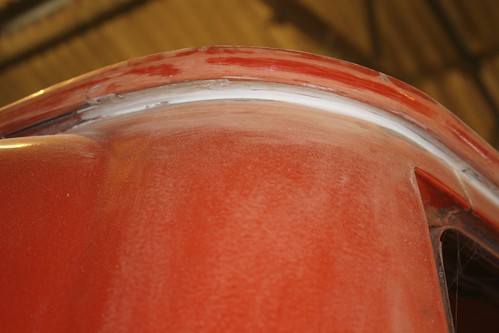
...and around the gutters

Pillars at the front with help from Carl (thanks Carl)
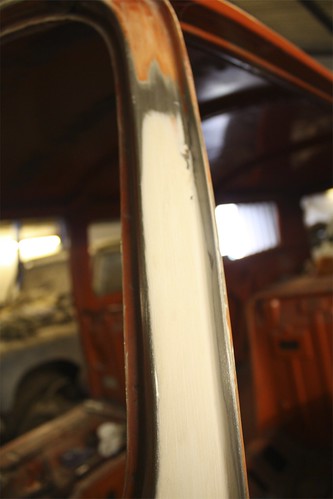
Been busy with the grinder on the o/s top of the swage line. The lip for the window was corroded a fair bit from quarterlight windows that were letting in water

Got Andy the guy I share the workshop with to put some handy welding skills onto it:
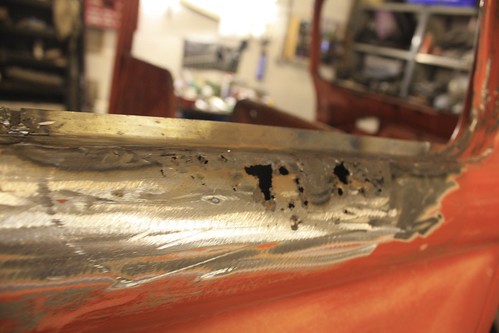

Been taking the grinder to the lower sections of the o/s panels. Some parts were peppered with holes. Sills are all good but I think again the leaky quarterlights are to blame...

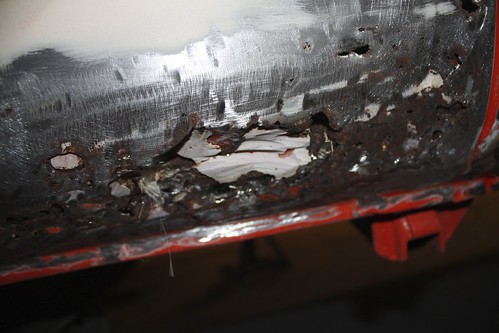
Remedying with some glass as I think this isn't too far gone to need welding
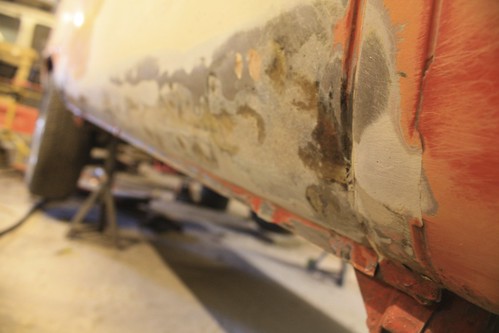
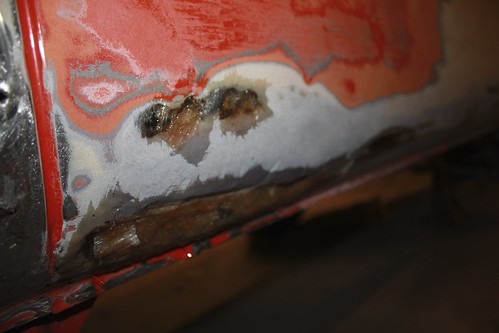
Just wanted to mention PPE. As sanding this stuff gave me really itchy arms
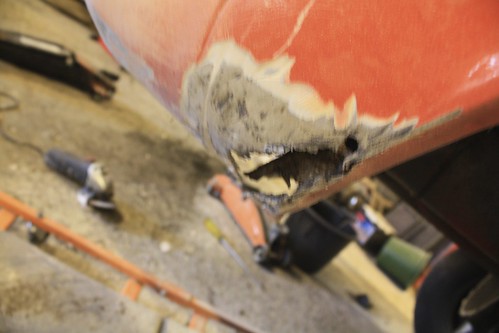
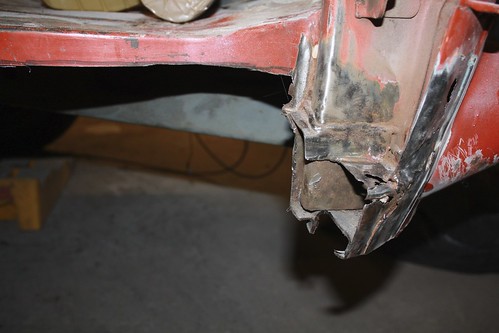
Noticed this bit at the back of the o/s rear wheel arch. Will need a section welded in later on I reckon
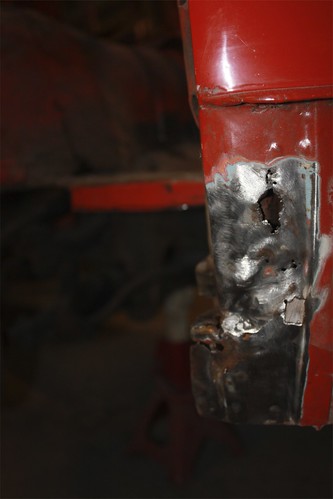
Right onto the step on the drivers side. Had some big holes from moisture that was held there under the rubber plate so went and purchased the inner and outer step repair section from Heritage.
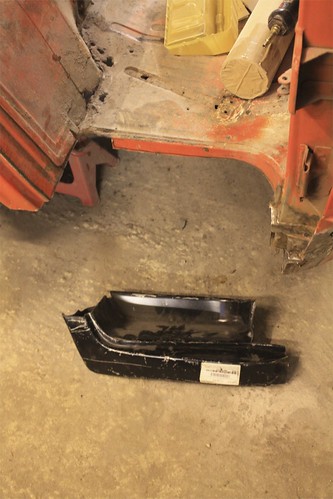
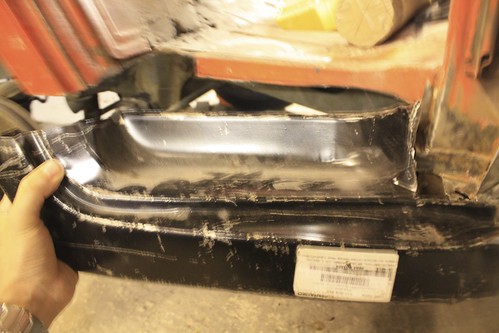
Been advised to cut the step up rather than the bus where possible. Rightly so as some of the Mexican stuff is pretty dubious. I'll be grinding out as best as I can for Andy to come and tickle with the torch. Pretty nerve racking cutting out to get it to fit.
Have also spent some time sat in the engine bay with degreaser and brushes getting rid of the caked on stuff.
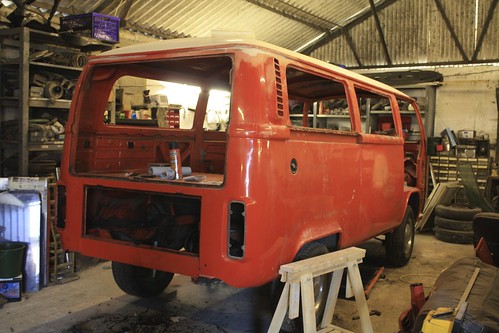
Getting cleaner every movement of the elbow
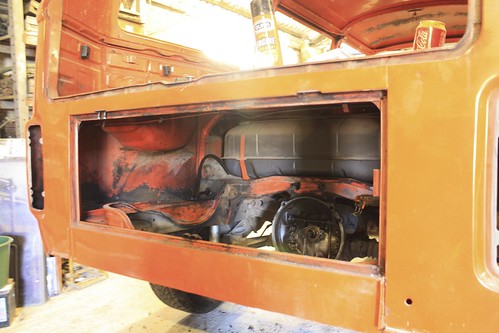
Had a go at a section of cracked filler on the rear valence
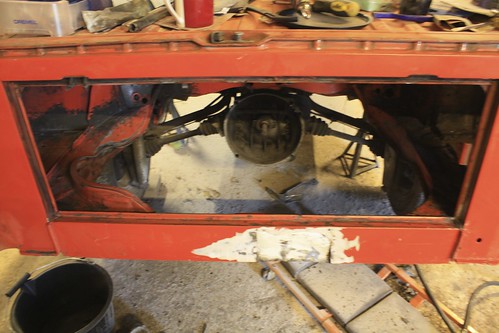
Revealed a bit of a dodgy repair. Looks like a piece of washing machine was rivetted in and fillered over with a trowel.
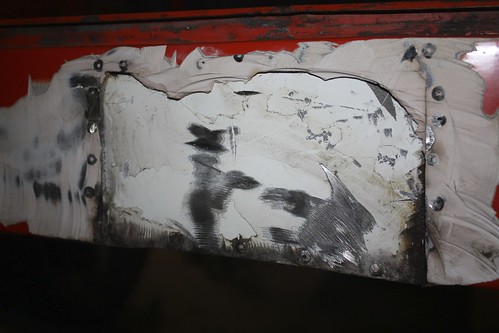
This is evidence of me scuffing the interior in little bursts with a bit of 240 grit. I like to mix things up a bit I know This is the sort of thing you can do while drinking a brew tho
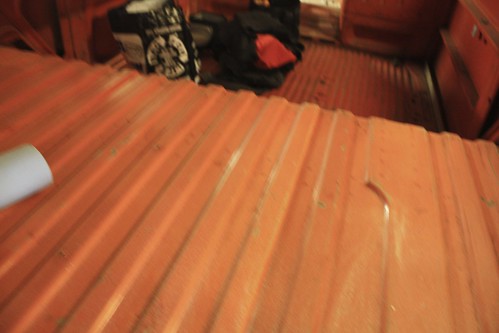
So that's where Im up to right now. I feel I'm making progress. It's slow going to me cos I see it almost everyday.
Also had some bad news last week. The guy I share with is planning to move out. Andy sorted me out with somewhere to work on the bus when I moved to Dorset and I was really stoked to have someone available to help now and then. He's moving to Wiltshire to the exact village where I used to live (what's the chances of that ?!?!?!?!) with 4 x offroad toys, toddler and pregnant wifey.
This will leave me with less access to good tools, his welding skills and maybe more rent for the workshop to pay for
I've heard of a guy that is interested in the space after Andy leaves. Apparently he maintains skool buses so things aren't looking so bad. I think theres gonna be a lot of delay to progress the rest of Aug as things change. I'm thinking I'll need to find a compressor for the DA and the eventual spray painting...oh well for now I'll just keep at it, with the rubber sanding block and find pink bogeys in my nostrils
See ya,
Rob
I've been busy at work since coming back from European Bug in (what a show
Still been making time in the evenings where I've been going wild with the DA, sanding block and skims of filler. Been exposing some more holes in places too
This on the passenger side

Drivers side floor area

I've got a floor repair section and inner and outer step to go in in this area
Started patching this hole up with a bit of fibreglass

Sorting out the lumps and bumps on the front panel


Sorting out the sliding door dents too

...and around the gutters


Pillars at the front with help from Carl (thanks Carl)

Been busy with the grinder on the o/s top of the swage line. The lip for the window was corroded a fair bit from quarterlight windows that were letting in water

Got Andy the guy I share the workshop with to put some handy welding skills onto it:


Been taking the grinder to the lower sections of the o/s panels. Some parts were peppered with holes. Sills are all good but I think again the leaky quarterlights are to blame...


Remedying with some glass as I think this isn't too far gone to need welding


Just wanted to mention PPE. As sanding this stuff gave me really itchy arms
Noticed this bit at the back of the o/s rear wheel arch. Will need a section welded in later on I reckon

Right onto the step on the drivers side. Had some big holes from moisture that was held there under the rubber plate so went and purchased the inner and outer step repair section from Heritage.


Been advised to cut the step up rather than the bus where possible. Rightly so as some of the Mexican stuff is pretty dubious. I'll be grinding out as best as I can for Andy to come and tickle with the torch. Pretty nerve racking cutting out to get it to fit.


Have also spent some time sat in the engine bay with degreaser and brushes getting rid of the caked on stuff.

Getting cleaner every movement of the elbow

Had a go at a section of cracked filler on the rear valence

Revealed a bit of a dodgy repair. Looks like a piece of washing machine was rivetted in and fillered over with a trowel.

This is evidence of me scuffing the interior in little bursts with a bit of 240 grit. I like to mix things up a bit I know

So that's where Im up to right now. I feel I'm making progress. It's slow going to me cos I see it almost everyday.
Also had some bad news last week. The guy I share with is planning to move out. Andy sorted me out with somewhere to work on the bus when I moved to Dorset and I was really stoked to have someone available to help now and then. He's moving to Wiltshire to the exact village where I used to live (what's the chances of that ?!?!?!?!) with 4 x offroad toys, toddler and pregnant wifey.
This will leave me with less access to good tools, his welding skills and maybe more rent for the workshop to pay for
I've heard of a guy that is interested in the space after Andy leaves. Apparently he maintains skool buses so things aren't looking so bad. I think theres gonna be a lot of delay to progress the rest of Aug as things change. I'm thinking I'll need to find a compressor for the DA and the eventual spray painting...oh well for now I'll just keep at it, with the rubber sanding block and find pink bogeys in my nostrils
See ya,
Rob

Aussiboris- Club Member

- Posts : 273
Join date : 2011-03-06
Age : 45
Location : Bournemouth
 Re: Boris
Sounds like good progress dude cant see the pics yet as im on my phone but will look at the weekend. That sucks about the workshop sharing if you need some help im sure we can bring the welder down somewhen? Got another days holiday left so could maybe do a bit after chase and status?

Liam- Forum Member

- Posts : 427
Join date : 2011-02-07
 Re: Boris
Some work on the van around that time would be great. I'm planning to take the Monday and Tuesday off so it can be a weekend of raving/welding/abrasing or nursing a hangover with brews and microwave hamburgers! Mmmmm


Aussiboris- Club Member

- Posts : 273
Join date : 2011-03-06
Age : 45
Location : Bournemouth
 Re: Boris
I can see it being a hangover recovery haha! Especualy as were goin to ibiza the week before!

Liam- Forum Member

- Posts : 427
Join date : 2011-02-07
 An update!!
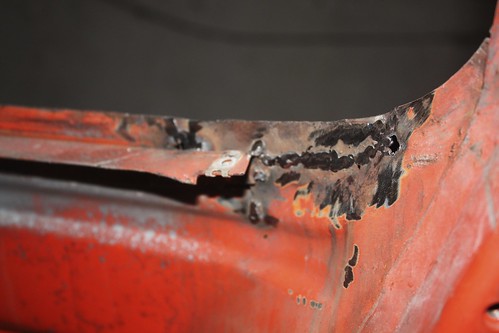
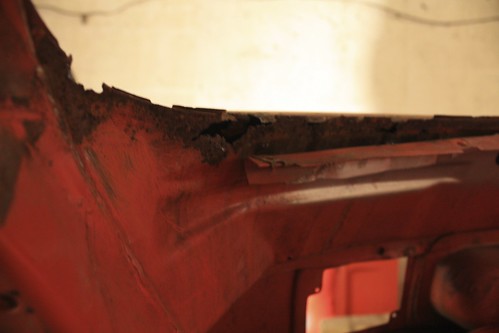
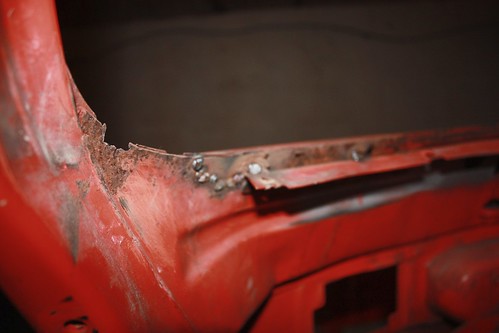
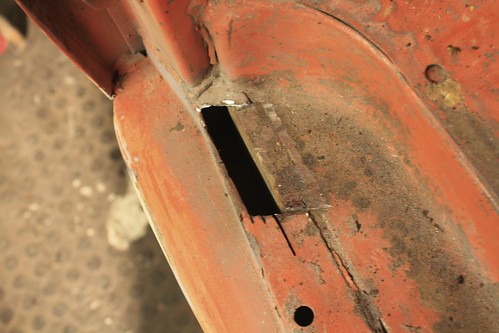
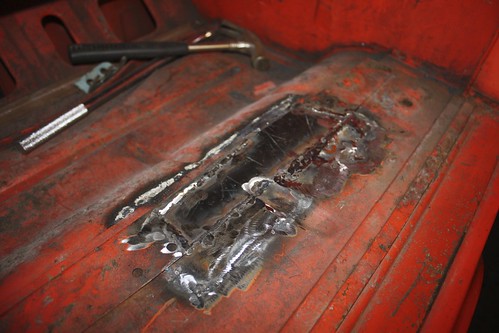
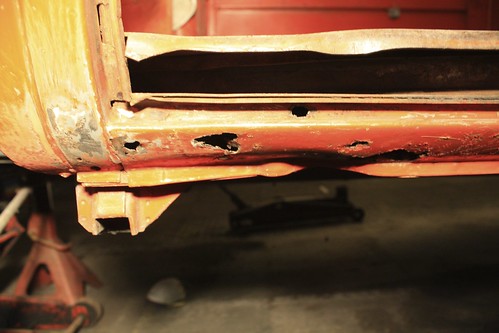
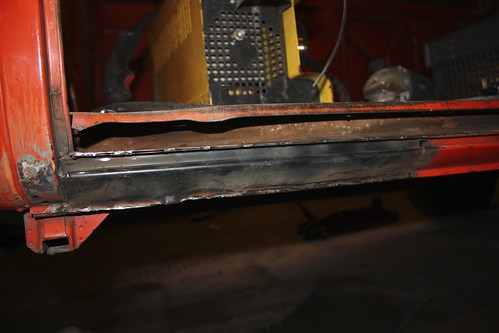
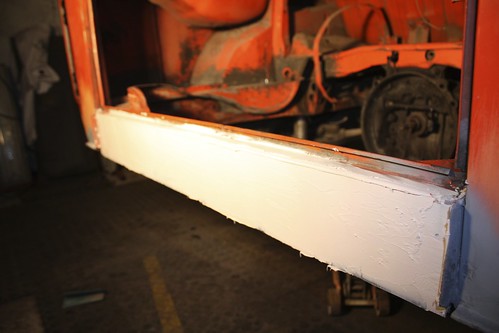
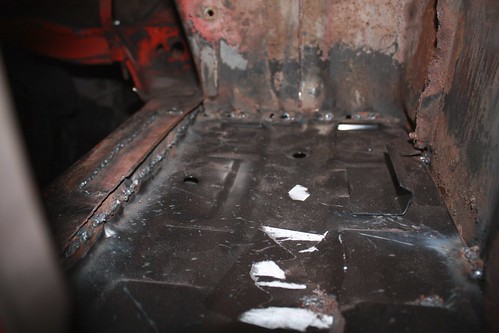
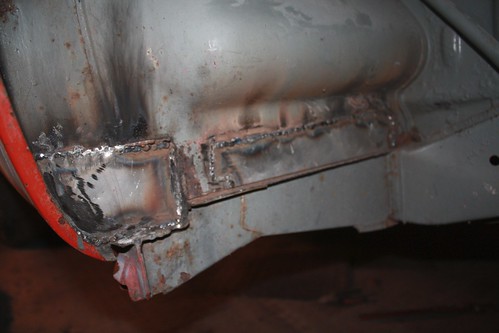
Not made much progress towards the back end of 2011 on the van. Other stuff always seems to get in the way like music fests, vw action and holidays. Also had the hurdle of getting little bits of welding done here and there and hadn't got round to finding someone. That changed last week when Myk, a bay owner and man with mobile welding capabilities dropped in. Within a couple of days and a few brews in freezing conditions he'd got all the torch tickling stuff done 
Here are a few before and after shots:
Windscreen lip
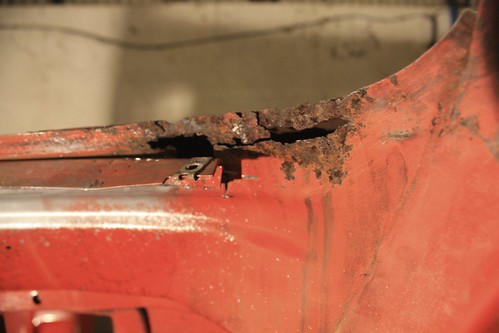
...other side
LHS step
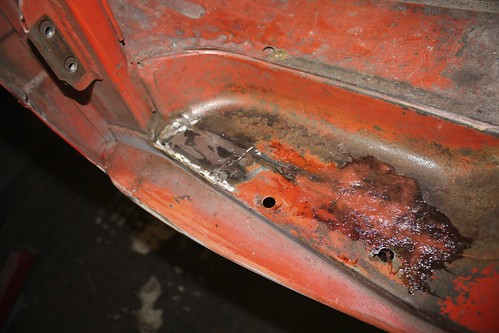

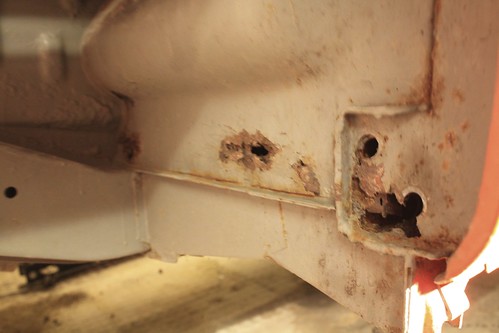
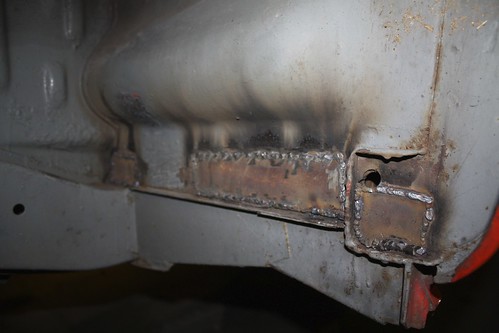

The battery tray was just a bodge so that came out:
In with the new...

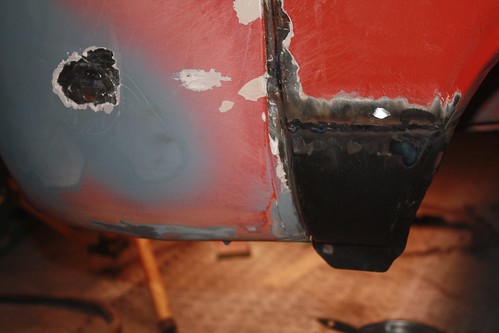
Some repairs to wheel arch rot...
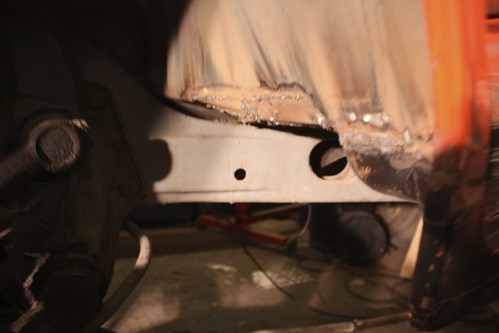
...and new step in
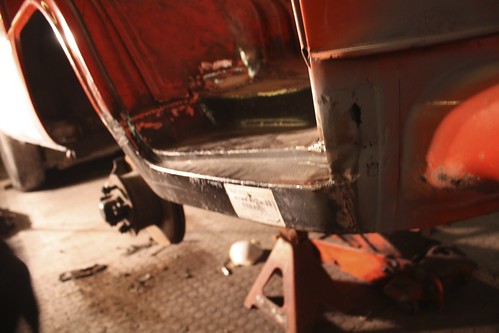

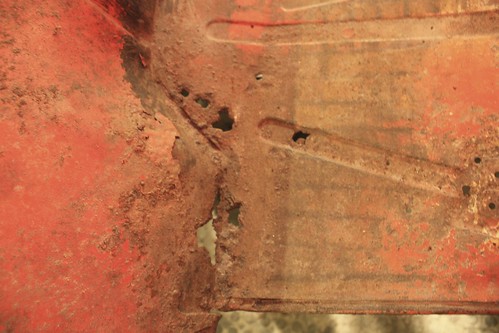
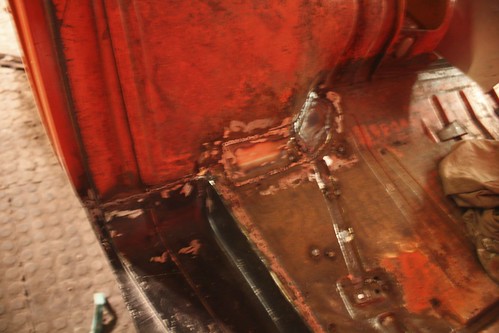
as well as some cab floor repairs
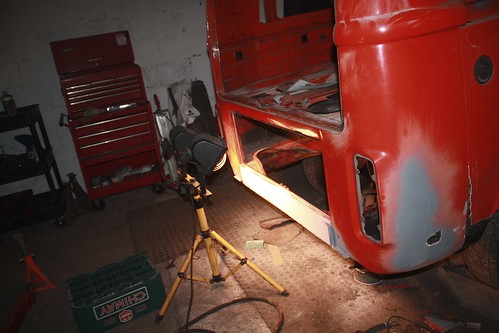
So now I'm getting busy with the grinder flatting back welds and getting some glass / filler smeared in. The cold weathers not helping much and I find that I need to get parts of the bus warmed up before skimming...
Hope to get more pics of progress up more regularly now so will get into the habit getting the camera out as part of each tea break. Can't forget the hob nobs of course!
Here are a few before and after shots:
Windscreen lip


...other side


LHS step


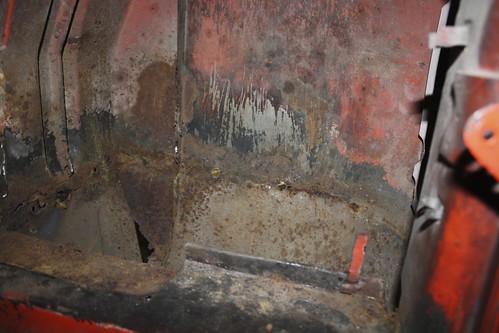
The battery tray was just a bodge so that came out:

In with the new...


Some repairs to wheel arch rot...


...and new step in


as well as some cab floor repairs


So now I'm getting busy with the grinder flatting back welds and getting some glass / filler smeared in. The cold weathers not helping much and I find that I need to get parts of the bus warmed up before skimming...

Hope to get more pics of progress up more regularly now so will get into the habit getting the camera out as part of each tea break. Can't forget the hob nobs of course!

Aussiboris- Club Member

- Posts : 273
Join date : 2011-03-06
Age : 45
Location : Bournemouth
 Re: Boris
Looking good dude great progress! Also got a hankering for some hobnobs to take to the workshop at the weekend!

Liam- Forum Member

- Posts : 427
Join date : 2011-02-07
 Re: Boris
Hobnobs are a necessity. I do have to keep thme in the fridge so the ratties down pilfer them though!

Aussiboris- Club Member

- Posts : 273
Join date : 2011-03-06
Age : 45
Location : Bournemouth
 Re: Boris
Coming along nicely, good to see you are putting the time in. Any ideas what colour you are going to spray it?

tint1n- Club Member

- Posts : 172
Join date : 2011-02-11
Age : 39
Location : Amesbury
 Re: Boris
Im thinking Carmine Red. Not sure about keeping the roof white. Will have to play on PS

Aussiboris- Club Member

- Posts : 273
Join date : 2011-03-06
Age : 45
Location : Bournemouth
 Wot I've been doing the last couple days...
...mostly glassing, skimming, sanding, dremmeling, DAing, priming (in small sections) etc etc.
Patching up the holes in the side swage:
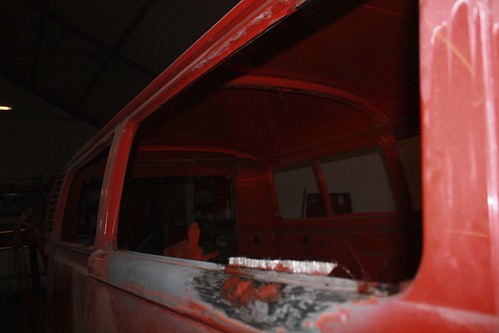
Sticky pink splodge
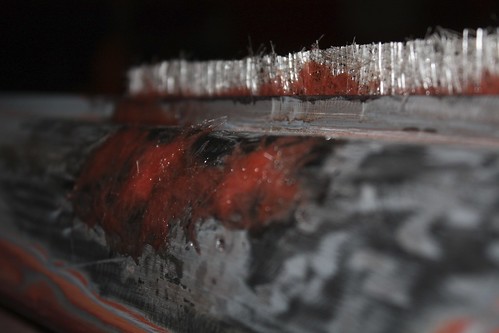
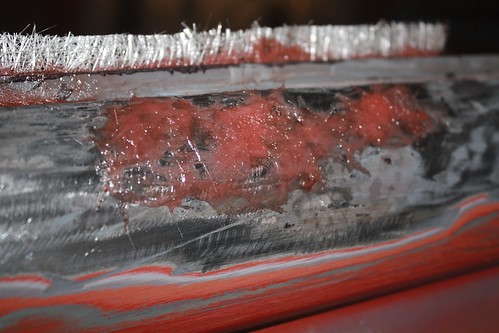
brushing glass on the window rim bits
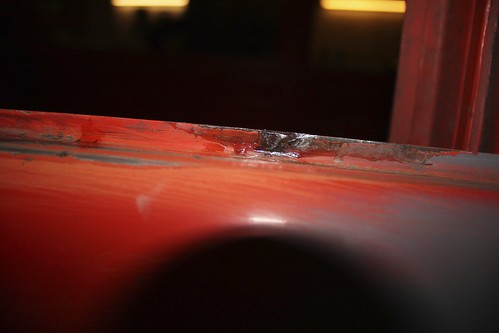
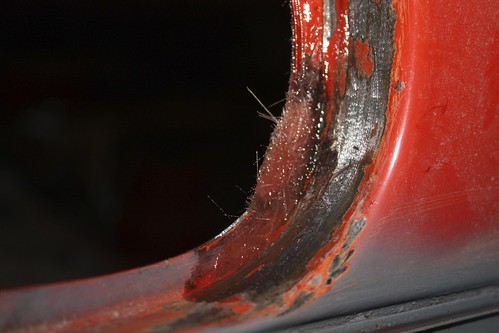
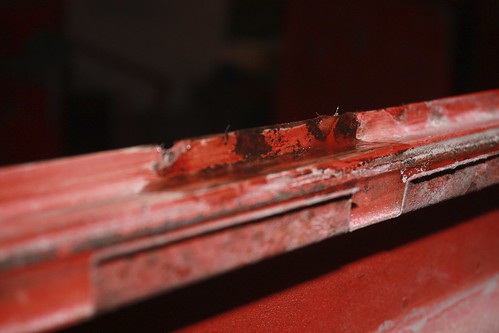
Cleaning up some more edges for rubbers/windows

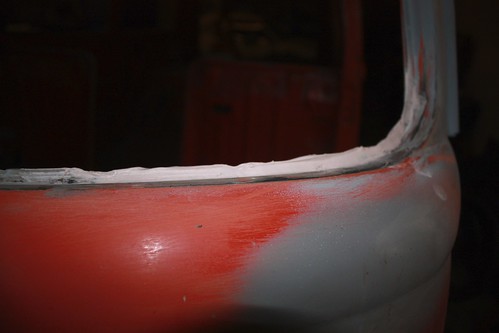
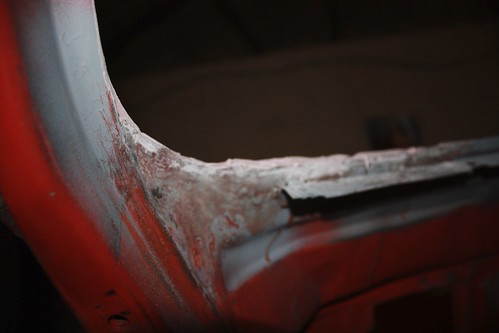
Looking better from inside the cab now:
Regularly skimming the U-Pol on the rear valence:

...and the RHS corner
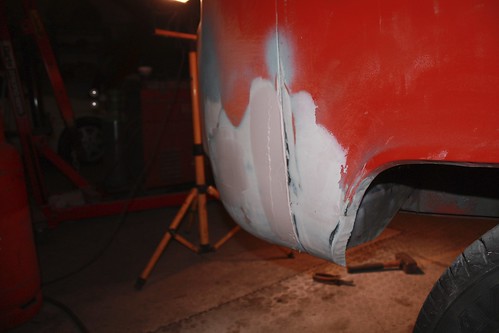
Making a massive mess

And keeping warm with this beast in between spurts of activity
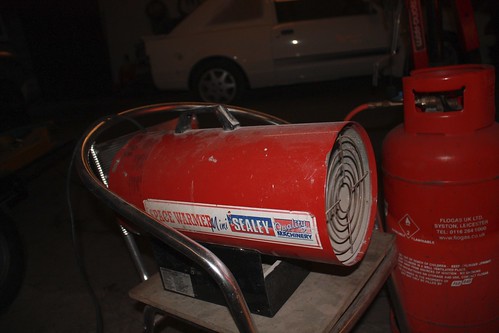
Although I tend to have it pointing towards the van to help filler stick

Had some issue with primer not wanting to stick to glass sections as it appears to have reacted. Looks like I'll be needing to take it back again!
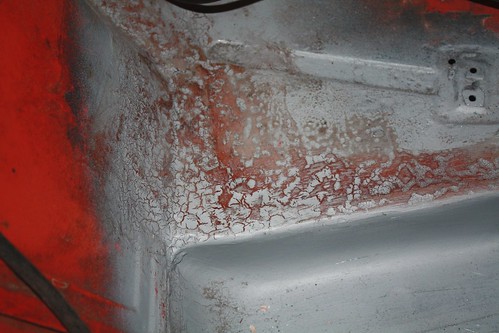
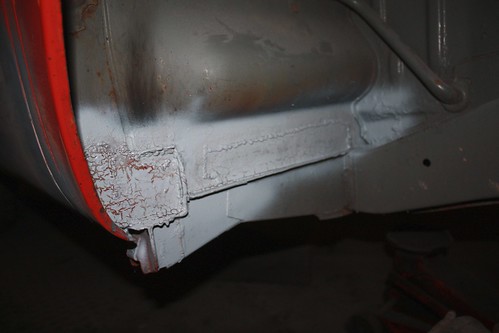
Boohoo. Happy sunday!
Patching up the holes in the side swage:

Sticky pink splodge


brushing glass on the window rim bits


Cleaning up some more edges for rubbers/windows


Looking better from inside the cab now:

Regularly skimming the U-Pol on the rear valence:

...and the RHS corner

Making a massive mess

And keeping warm with this beast in between spurts of activity

Although I tend to have it pointing towards the van to help filler stick

Had some issue with primer not wanting to stick to glass sections as it appears to have reacted. Looks like I'll be needing to take it back again!


Boohoo. Happy sunday!

Aussiboris- Club Member

- Posts : 273
Join date : 2011-03-06
Age : 45
Location : Bournemouth
 Re: Boris
Good work there Rob envious of that heater we were freezing down the workshop last couple of weekends. Is that the glass fibre or residue that has reactited with the primer, I've used fibre before but never had that happen we use panel wipe on panels before spraying though. Daz

Grizzly- Club Member

- Posts : 1358
Join date : 2011-02-04
Location : Hampshire
 Re: Boris
I expect it's the residue that's reacted with the primer. Difficult getting the stuff to dry completely in the cold so started sticking spot lamps over it to harden. Generally scuff it with production paper and then spray over with primer has been working for me.
The heater doesn't belong to me but has been left there by others that use the workshop though I think I've been pilfering most of the gas. he he
The heater doesn't belong to me but has been left there by others that use the workshop though I think I've been pilfering most of the gas. he he

Aussiboris- Club Member

- Posts : 273
Join date : 2011-03-06
Age : 45
Location : Bournemouth
 Re: Boris
Going great guns dude! Dont know how you manage to find all those hours in a day!

Liam- Forum Member

- Posts : 427
Join date : 2011-02-07
 Re: Boris
Going regularly is the key. Armed with brew making stuff, hobnobs and mirowave dinners 

Aussiboris- Club Member

- Posts : 273
Join date : 2011-03-06
Age : 45
Location : Bournemouth
 Re: Boris
Been getting down the workshop a lot lately, getting dusty in the evenings after work and even dining inside the van with a popity-ping microwave curry 
It still look like this
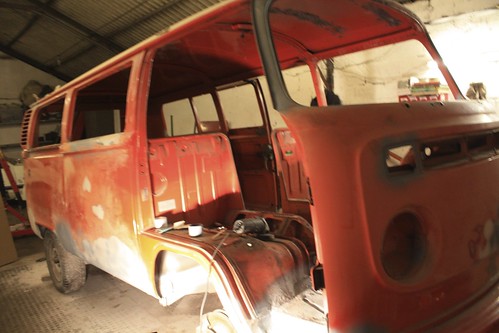
But many of the bad bits are looking so much better
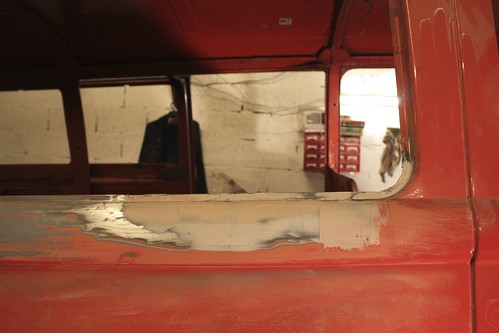
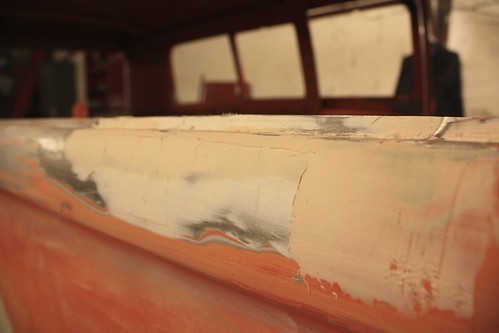

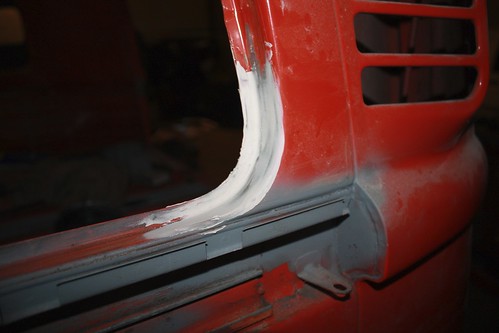

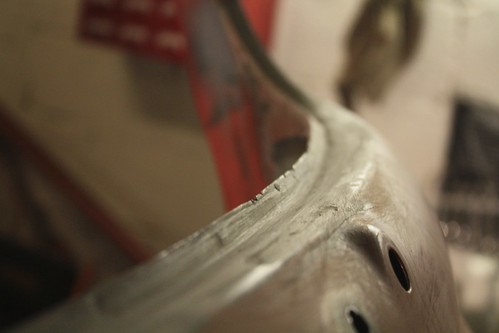
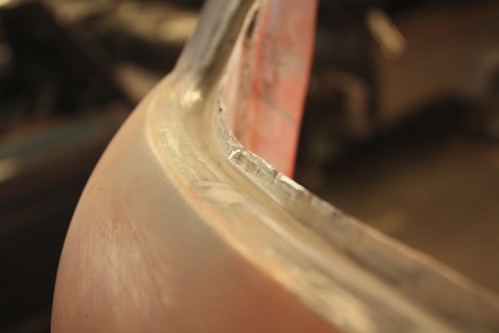
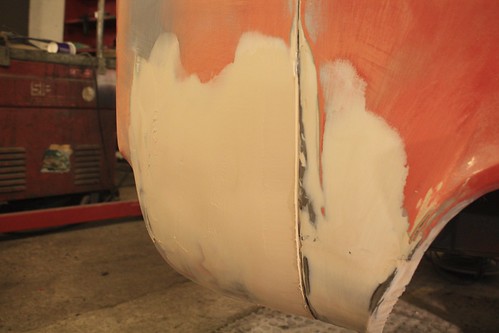
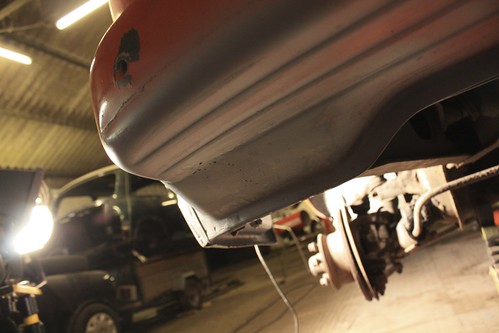
Have been really pleased with the way I've managed to clean up the lips on the windows. The windscreen lip is looking particularly good compared to how it used to.
Today I also took the sliding door off.
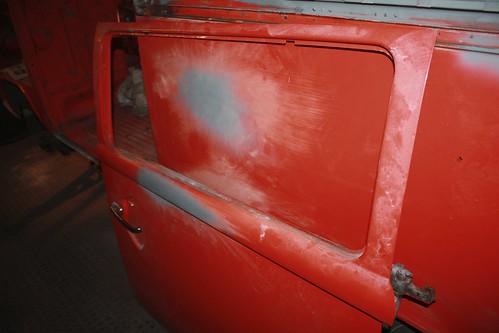
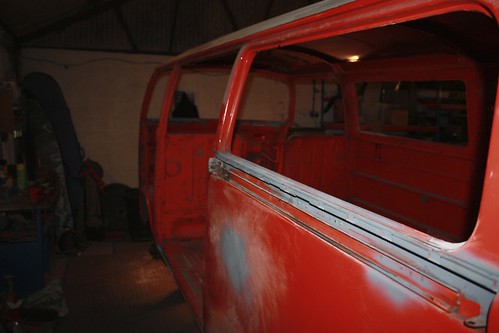
All the fasteners on the door came off no problem with a bit of penetrating oil but getting the external handle off was a bit of a bugger.
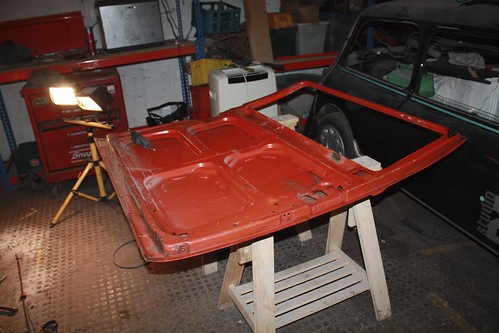
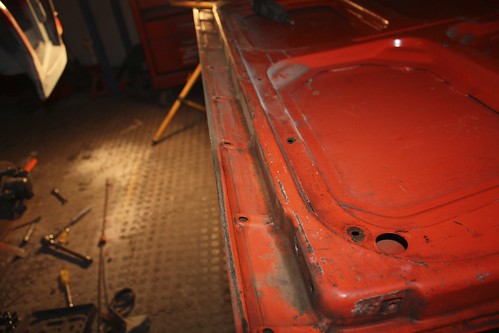
The bottom of the door is looking pretty good. Will be giving it a bit of a scrub this week
I've also drained the brake fluid and removed the master cylinder and servo for a clean up
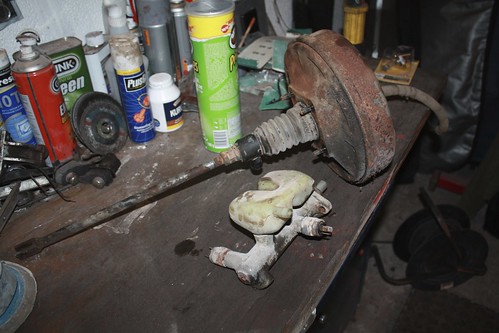
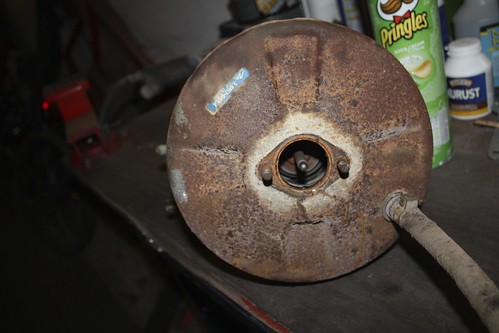
The tubing was pretty knackered and will need replacing

Anyone know of a way to test the brake servo?
So that's where things are now. I realised that I grossly underestimated the required amount of filler - now on the 4th tub of U-Pol. Not really packing it in but I tend to be quite thorough with several applications in some areas to get the right shape. I make sure that I leave the compressor on at the end of the night so I can blast the dust off my clothes and hair it gets everywhere!
It still look like this

But many of the bad bits are looking so much better


Have been really pleased with the way I've managed to clean up the lips on the windows. The windscreen lip is looking particularly good compared to how it used to.
Today I also took the sliding door off.


All the fasteners on the door came off no problem with a bit of penetrating oil but getting the external handle off was a bit of a bugger.

The bottom of the door is looking pretty good. Will be giving it a bit of a scrub this week

I've also drained the brake fluid and removed the master cylinder and servo for a clean up


The tubing was pretty knackered and will need replacing

Anyone know of a way to test the brake servo?
So that's where things are now. I realised that I grossly underestimated the required amount of filler - now on the 4th tub of U-Pol. Not really packing it in but I tend to be quite thorough with several applications in some areas to get the right shape. I make sure that I leave the compressor on at the end of the night so I can blast the dust off my clothes and hair it gets everywhere!

Aussiboris- Club Member

- Posts : 273
Join date : 2011-03-06
Age : 45
Location : Bournemouth
 Re: Boris
looking good rob the window openings look very good there a hard area to get right!

Liam- Forum Member

- Posts : 427
Join date : 2011-02-07
 Re: Boris
You could say Im a bit of an expert now. It's actually not too bad if you make use of the nylon sheet stuff from the glassing kit, scissors, paintbrush and dremmel. Are all your window lips intact?

Aussiboris- Club Member

- Posts : 273
Join date : 2011-03-06
Age : 45
Location : Bournemouth
 Re: Boris
Aussiboris wrote:You could say Im a bit of an expert now. It's actually not too bad if you make use of the nylon sheet stuff from the glassing kit, scissors, paintbrush and dremmel. Are all your window lips intact?
Ummmm in a word no! Haha! Theres lots of metal that needs to be let in mine!

Liam- Forum Member

- Posts : 427
Join date : 2011-02-07
 Re: Boris
I may have some sections to donate if needed. Some of that L-shape is scattered about somewhere in the barn.

Aussiboris- Club Member

- Posts : 273
Join date : 2011-03-06
Age : 45
Location : Bournemouth
 Re: Boris
Aussiboris wrote:I may have some sections to donate if needed. Some of that L-shape is scattered about somewhere in the barn.
Cheers dude. Just got myself a sheet metal floder so hopefully will be able to make some!

Liam- Forum Member

- Posts : 427
Join date : 2011-02-07
Page 2 of 6 •  1, 2, 3, 4, 5, 6
Page 2 of 6
Permissions in this forum:
You cannot reply to topics in this forum
